Introduction to the Risograph
The Risograph printer is a digital stencil duplicator that uses spot colour inks to produce multiples. The equipment, including the printers themselves and ink drums are manufactured by Japanese company Riso Kagaku Corporation 理想科学工業株式会社.
This print process uses Rice-bran oil inks, which have better degradability properties than their petroleum-based counterparts, and the printer runs almost entirely without thermal energy, making it much more energy efficient than most digital printing processes such as laserjet and inkjet printing.
Risograph printing is most cost effective in medium-sized runs - typically 50 to 5000 copies. This is due to the complex combination of print set-up time, consumables required and the actual printing time of the process. In comparison, digital printing processes have almost no set-up required meaning they are perfect for one-offs and small runs; offset lithography has a much more labour-intensive set-up, but the printing is much quicker making it ideal for large runs of 1000 and more.
A Brief History of Risograph Printing
The technology of the Risograph printing process originally stems from Mimeography, which, like the Risograph, creates print impressions by forcing ink through a stencil around a centralised cylinder (drum). Mimeographs eventually became the original 'home printer' and offered an affordable means of producing short runs, and birthed both self-publishing and the fanzine in the 1940s.
The Risograph essentially combines the interface and digital capabilities of Photocopying with the mechanics of the Mimeograph.
The Mechanics of the Printer
We currently operate two Riso MH9350 printers. These are double drum machines, meaning we can print two colours in a single pass.
- Most Risograph printers have a scan-bed that can be used to directly copy artwork onto the stencil
- Paper load tray, where uncoated paper is loaded before printing
- Feed rollers are used initially to drag the paper through the printer
- Print drums - once the master(s) have been made and wrapped around the drum(s), these rotate and contact the paper as it is fed via the pressure rollers creating the print
- Pressure rollers guide the paper under the spinning drum and enable the impression to be made
- The thermal master-making unit ‘burns’ the artwork onto the master substrate before it is wrapped around the ink drum to create the stencil
- Print delivery tray, where the prints land after the impression is made
- User interface and touch-screen
Artworking for Riso
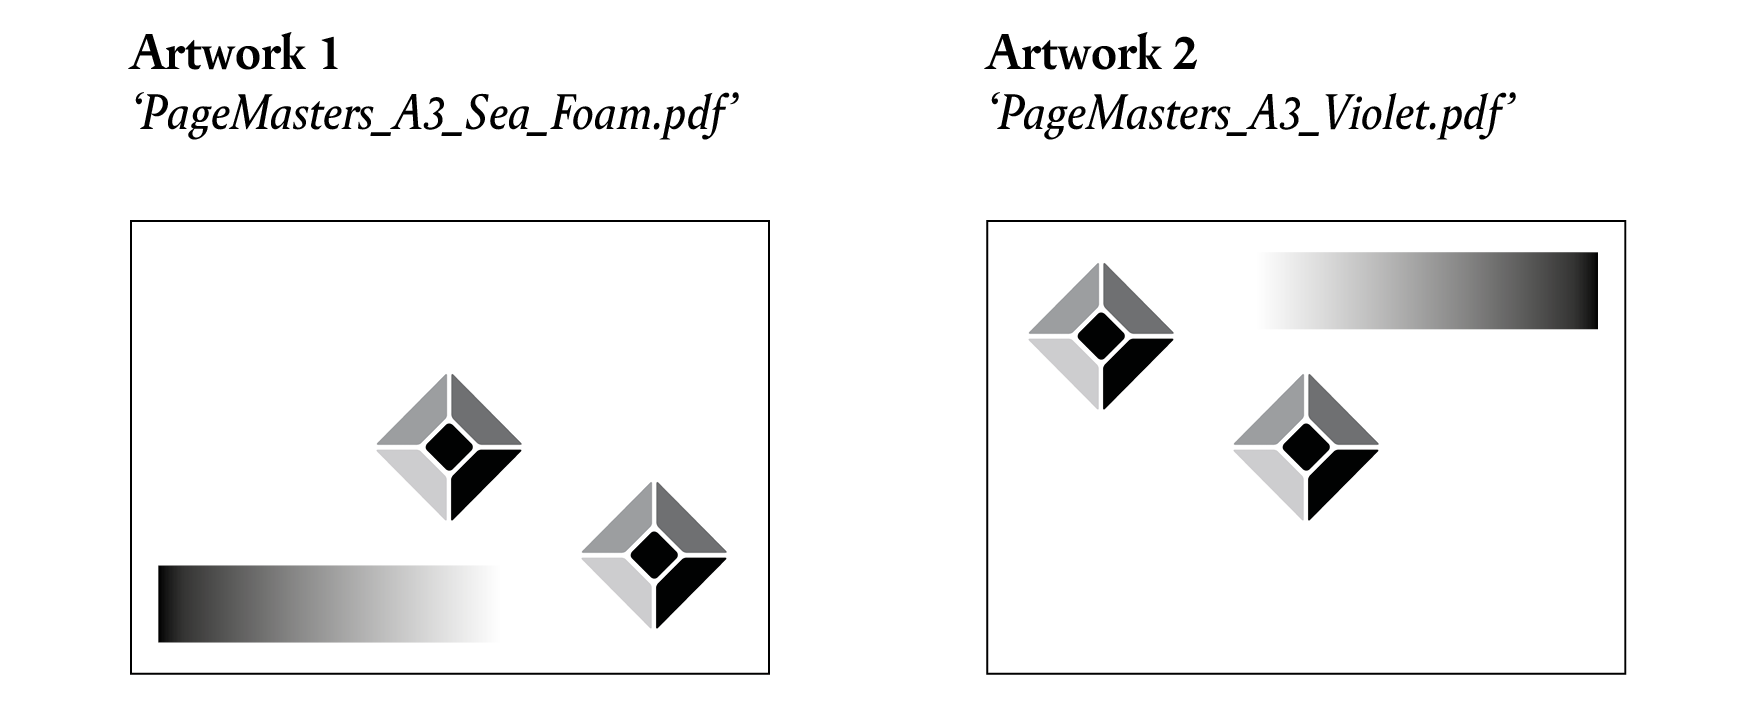
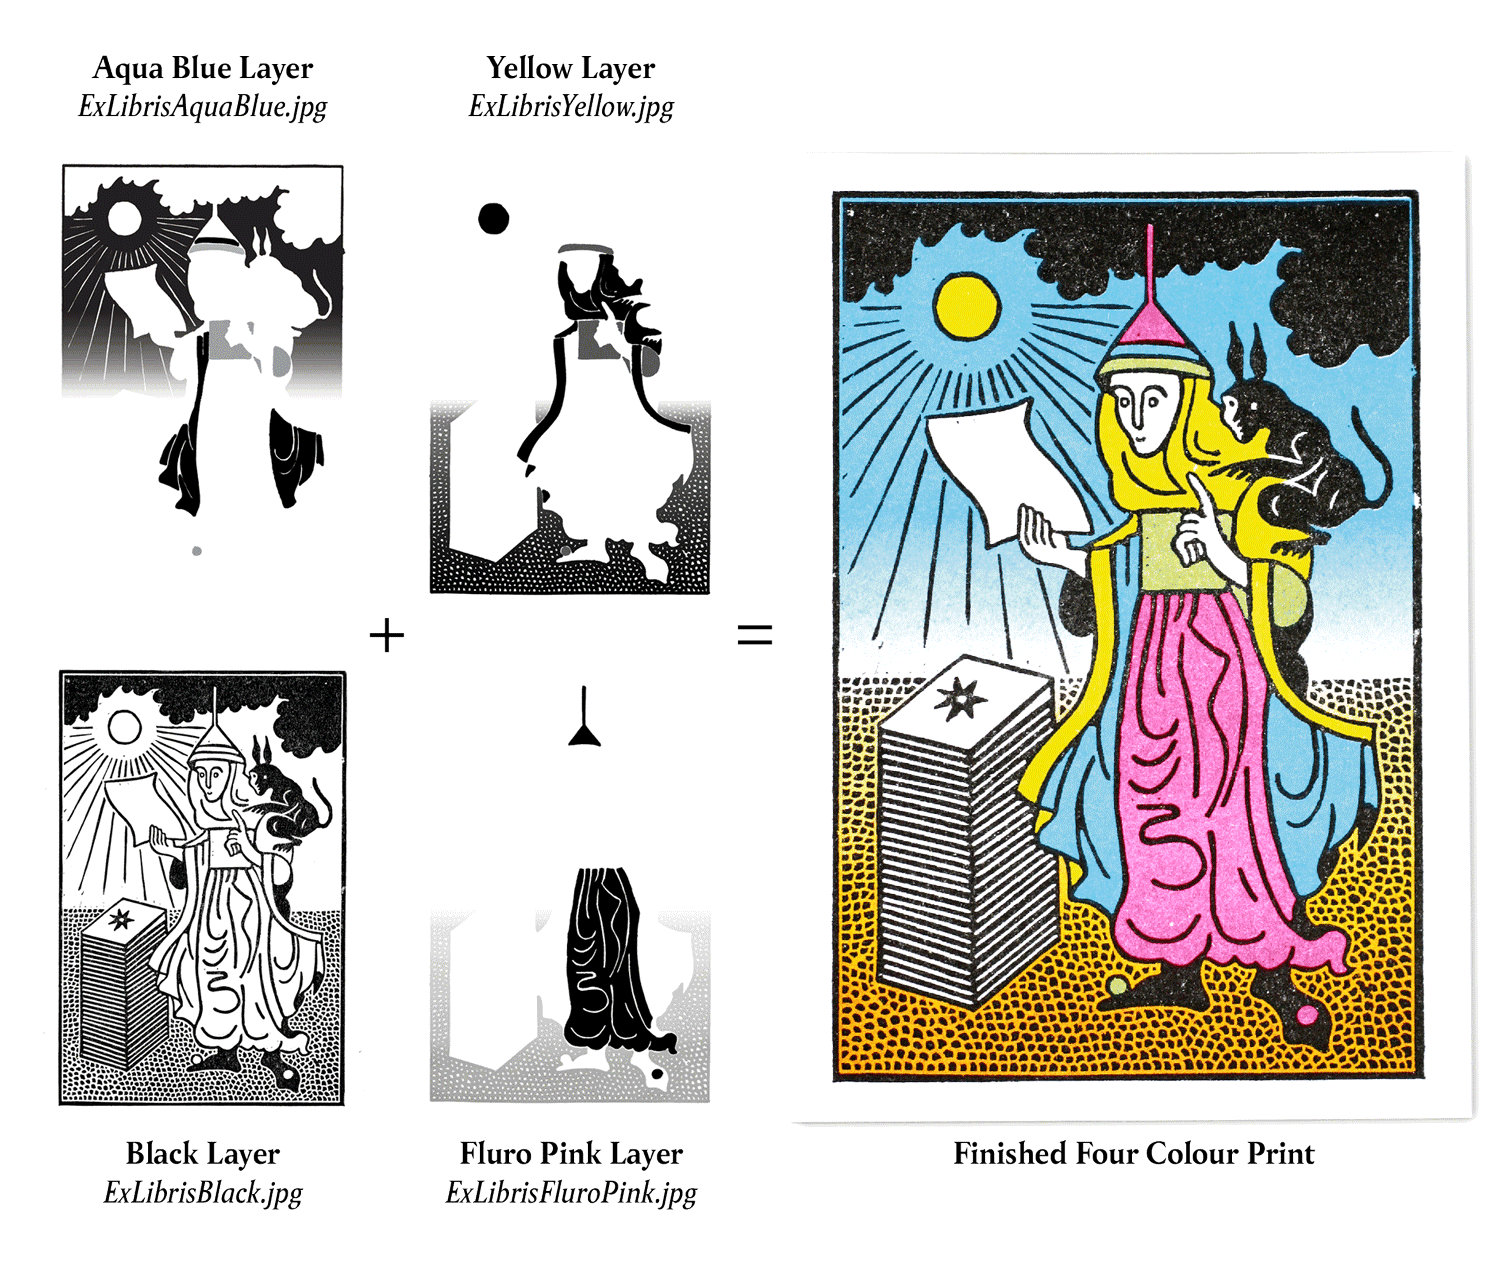
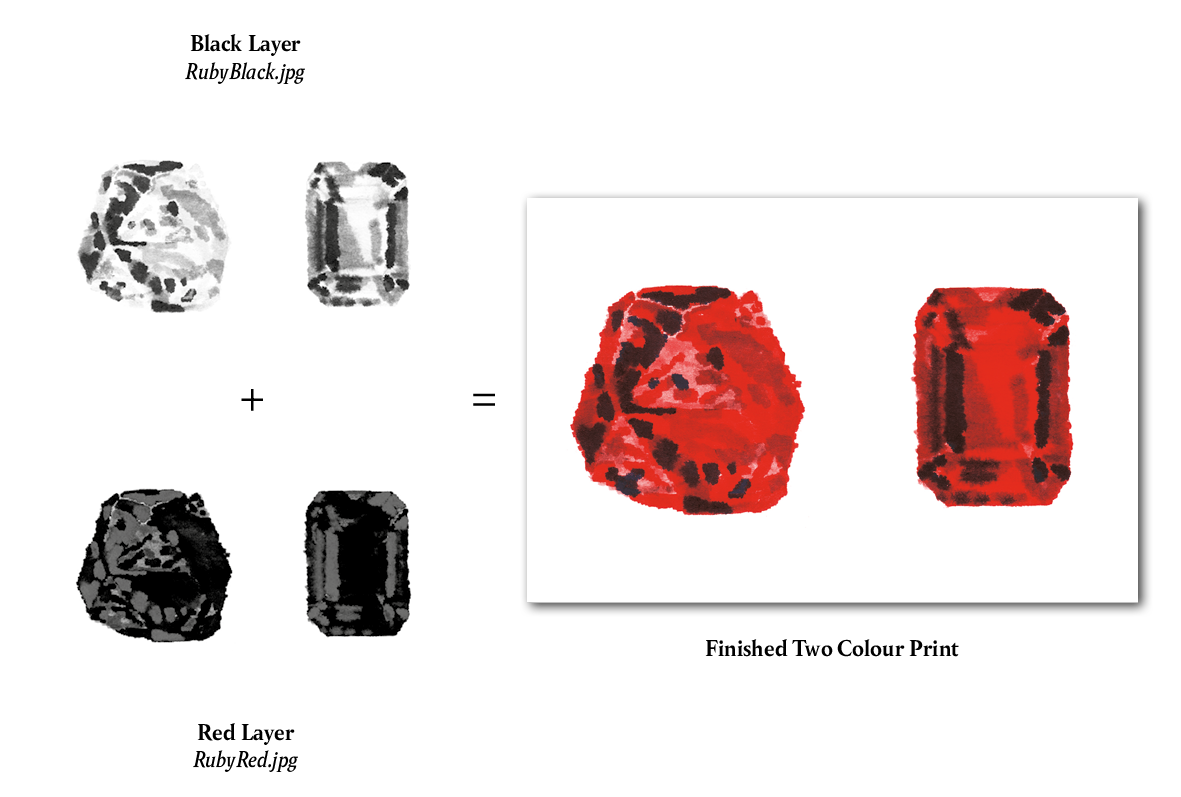
The Risograph printer doesn’t read colour like a digital printer would; all artwork needs to be colour separated and supplied as individual grayscale files.
Any grey tones will be automatically converted into a half-tone pattern by the printer, so, unlike colour separating for screen printing, you don't need to create your own half-tones.
All the non-metallic Riso inks are very transparent, so perfect for mixing to create new colours. You can use 'Spot Channels' in Photoshop to accurately simulate how your artwork will print. All the most accurate Pantone references can be found in the Colours section below.
All image-based artwork should be supplied as separated jpegs or pdfs, whereas any artwork with vectors (including type) should be supplied as pdfs only.
If you are unconfident in any of the processes involved in artworking for Riso, we can help you for a small additional charge.
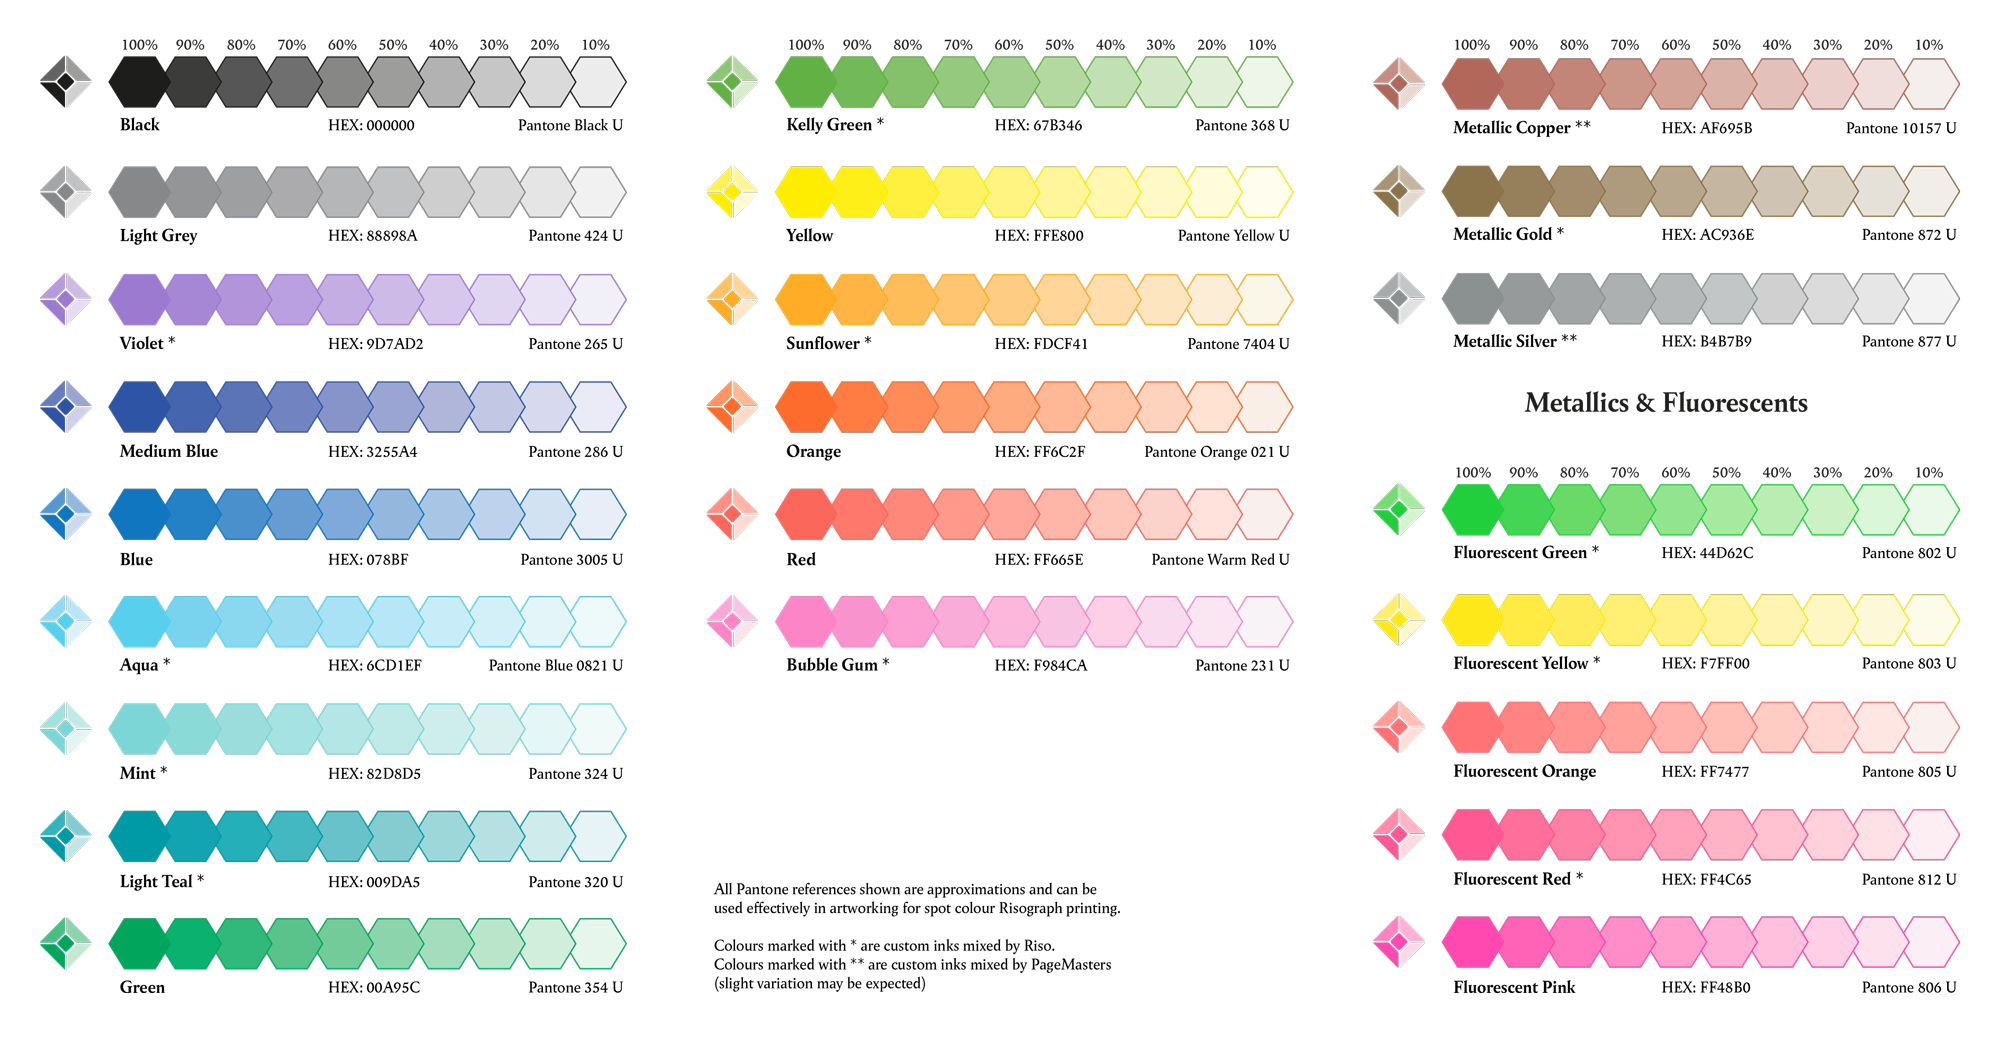
Colours
We currently have 23 inks to choose from, all of which are Rice-bran oil based.
Below you can see the digital representation of the colour, complete with their closest Pantone and HEX references.
Registration
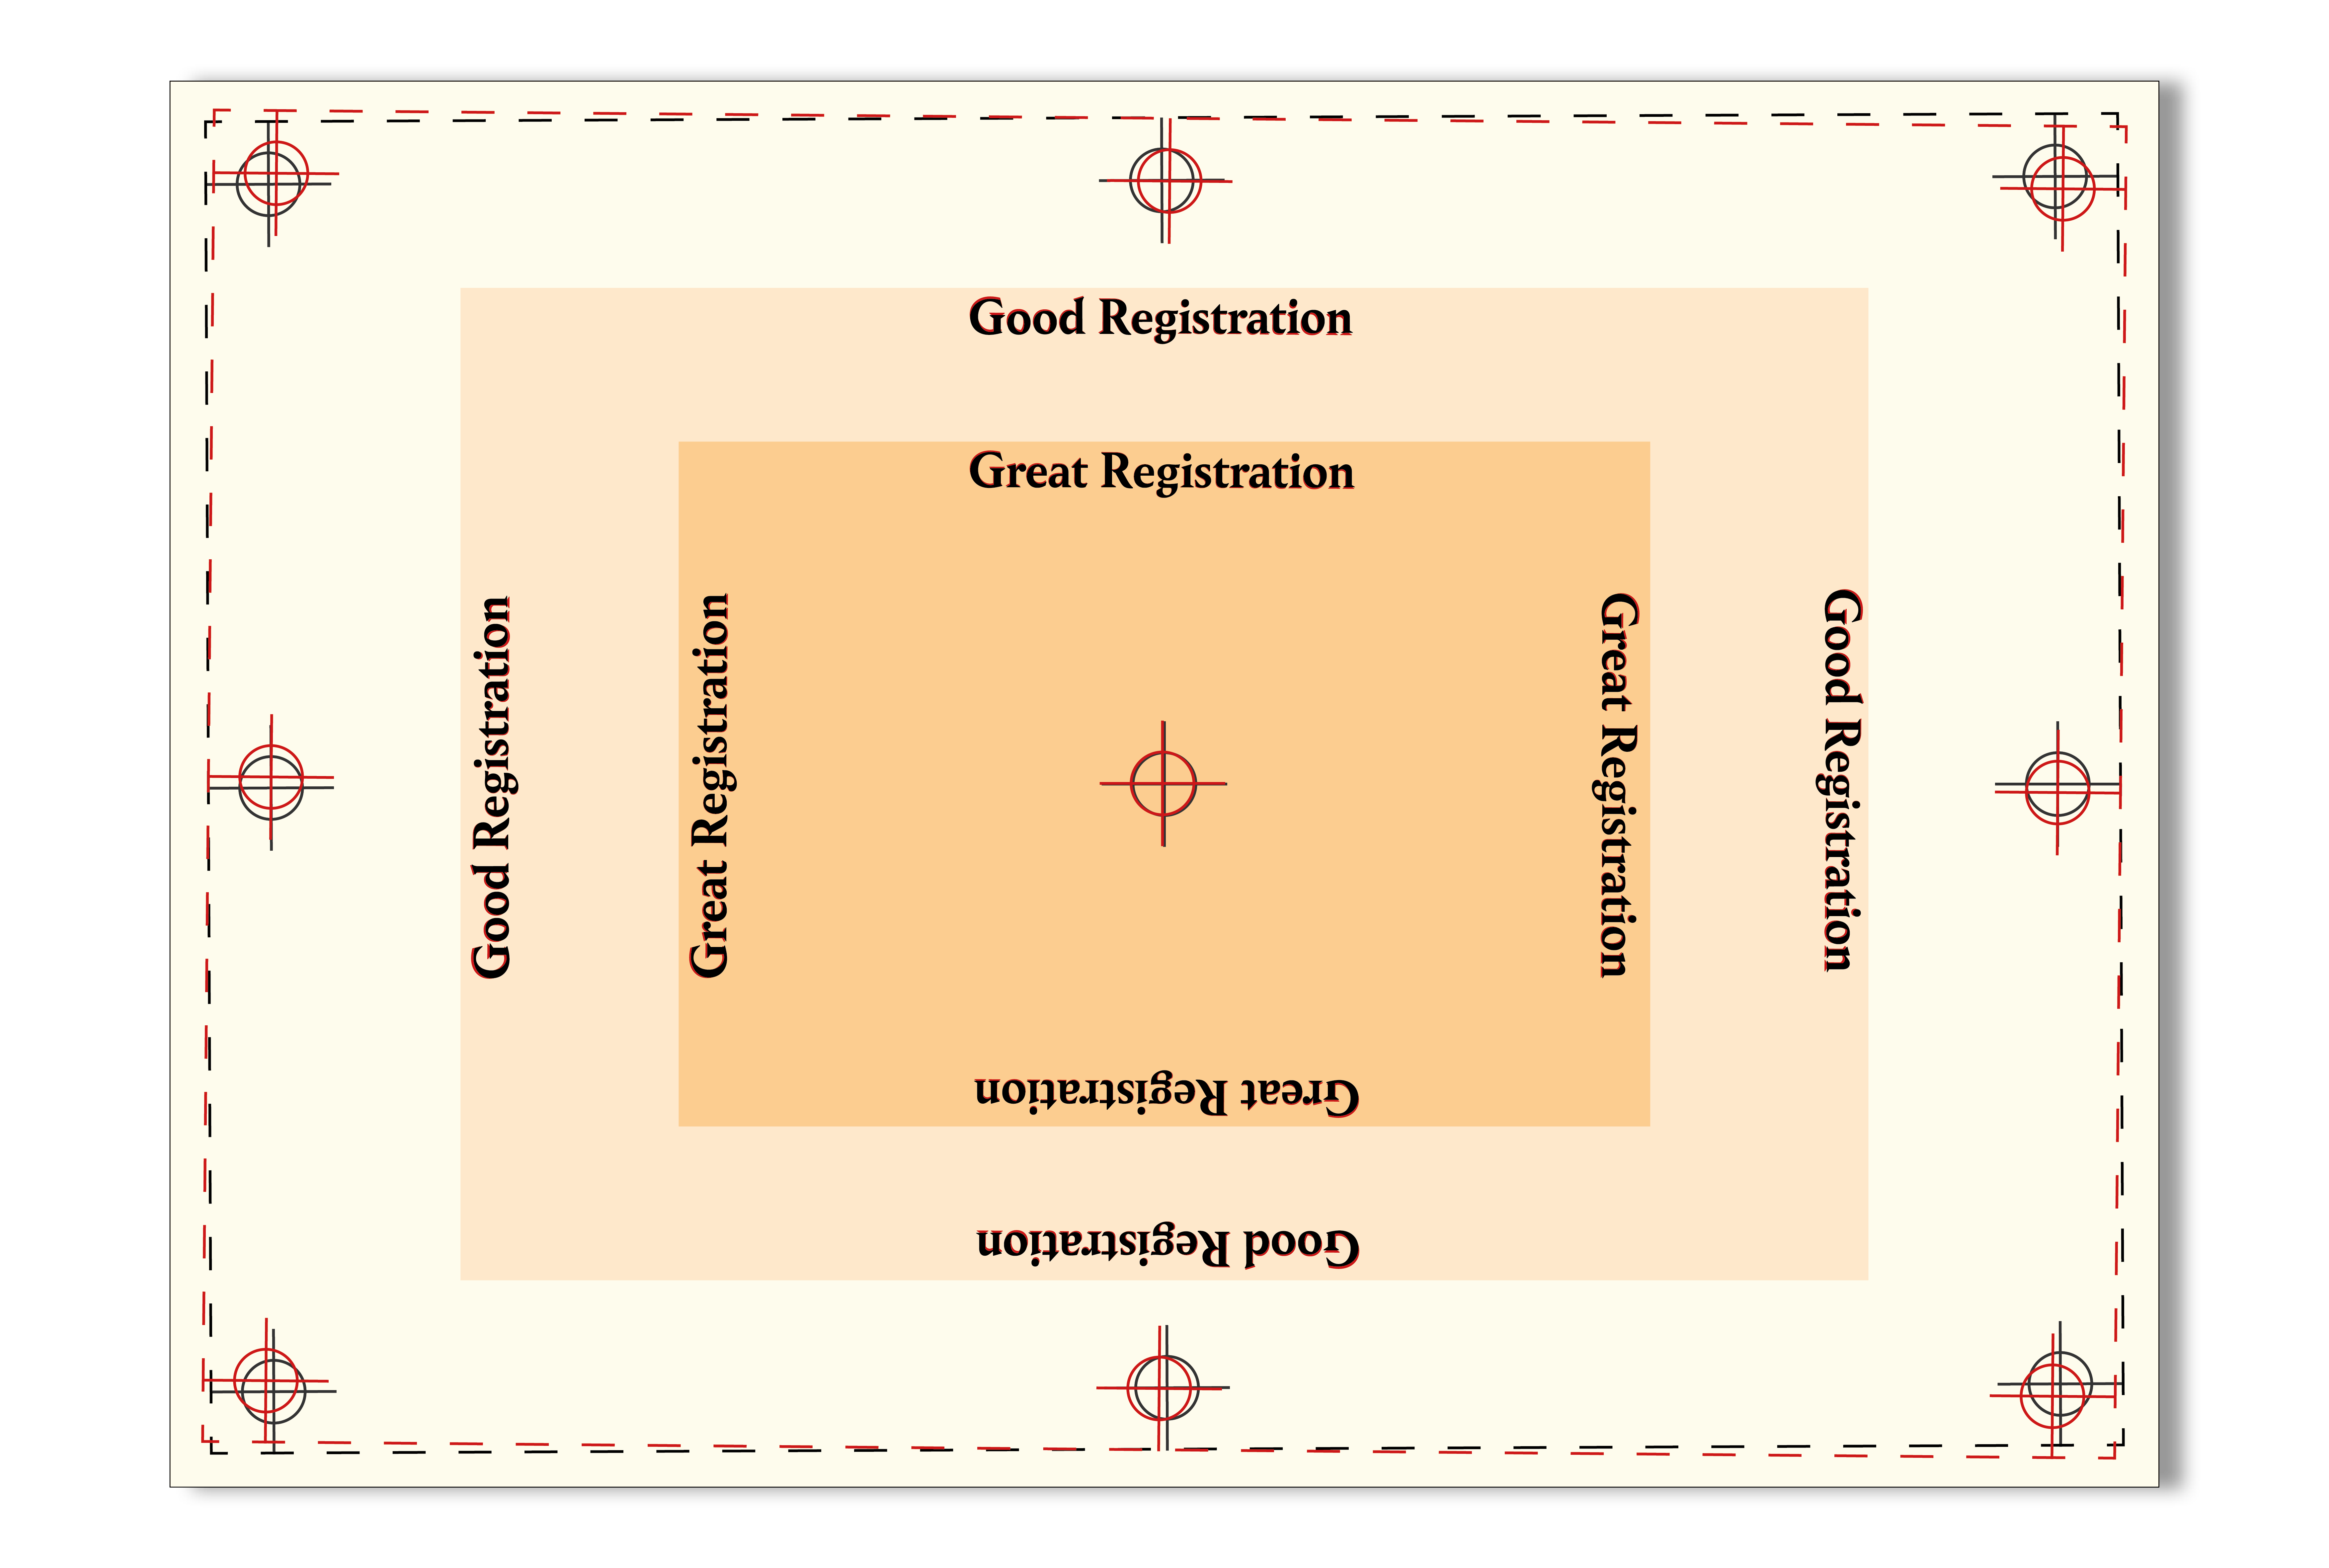
It is important to understand and even appreciate that Risograph printing isn't for achieving the pin-point perfect registration that you might expect from digital processes or offset lithography. This is mainly due to its purpose as a duplicator - making multiples both quickly and economically.
The masters (or stencils) are made on a flimsy film, as opposed to something more rigid like a printing plate. Very slight skewing is expected with Risograph printing, creating a charming and unique result.
The diagram below should help illustrate how adding wide margins to your print can improve the overall registration. Mis-registration is most prevalent towards the corners of the A3.

Trapping
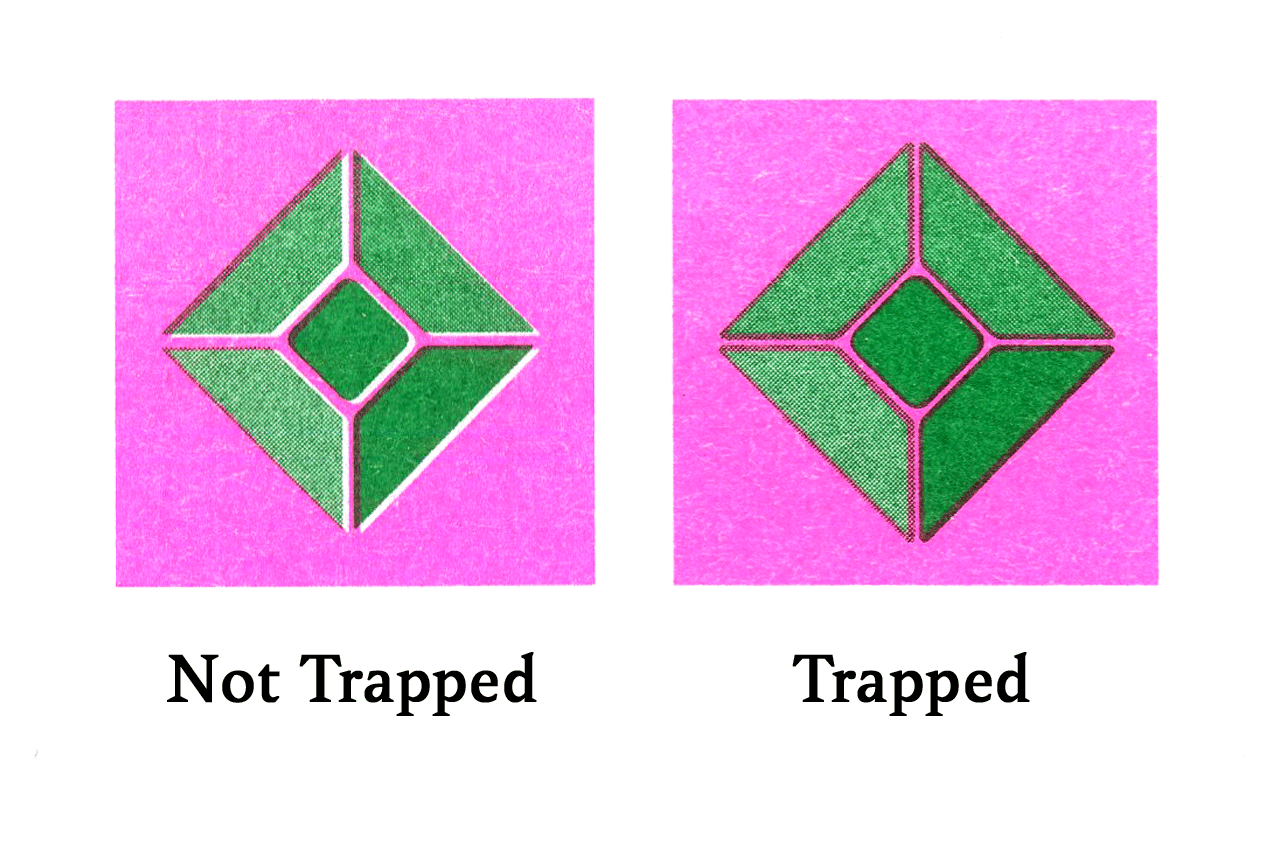
Trapping is a pre-press technique that can be implemented to aid in registration during the printing process.
Essentially it involves creating a small overlap between interacting printed layers to counter any movement or skewing that generally arise with the Risograph process. This is usually done by either making the shape(s) bigger than the space they are meant to fill, or by making the negative space smaller.
Sizing
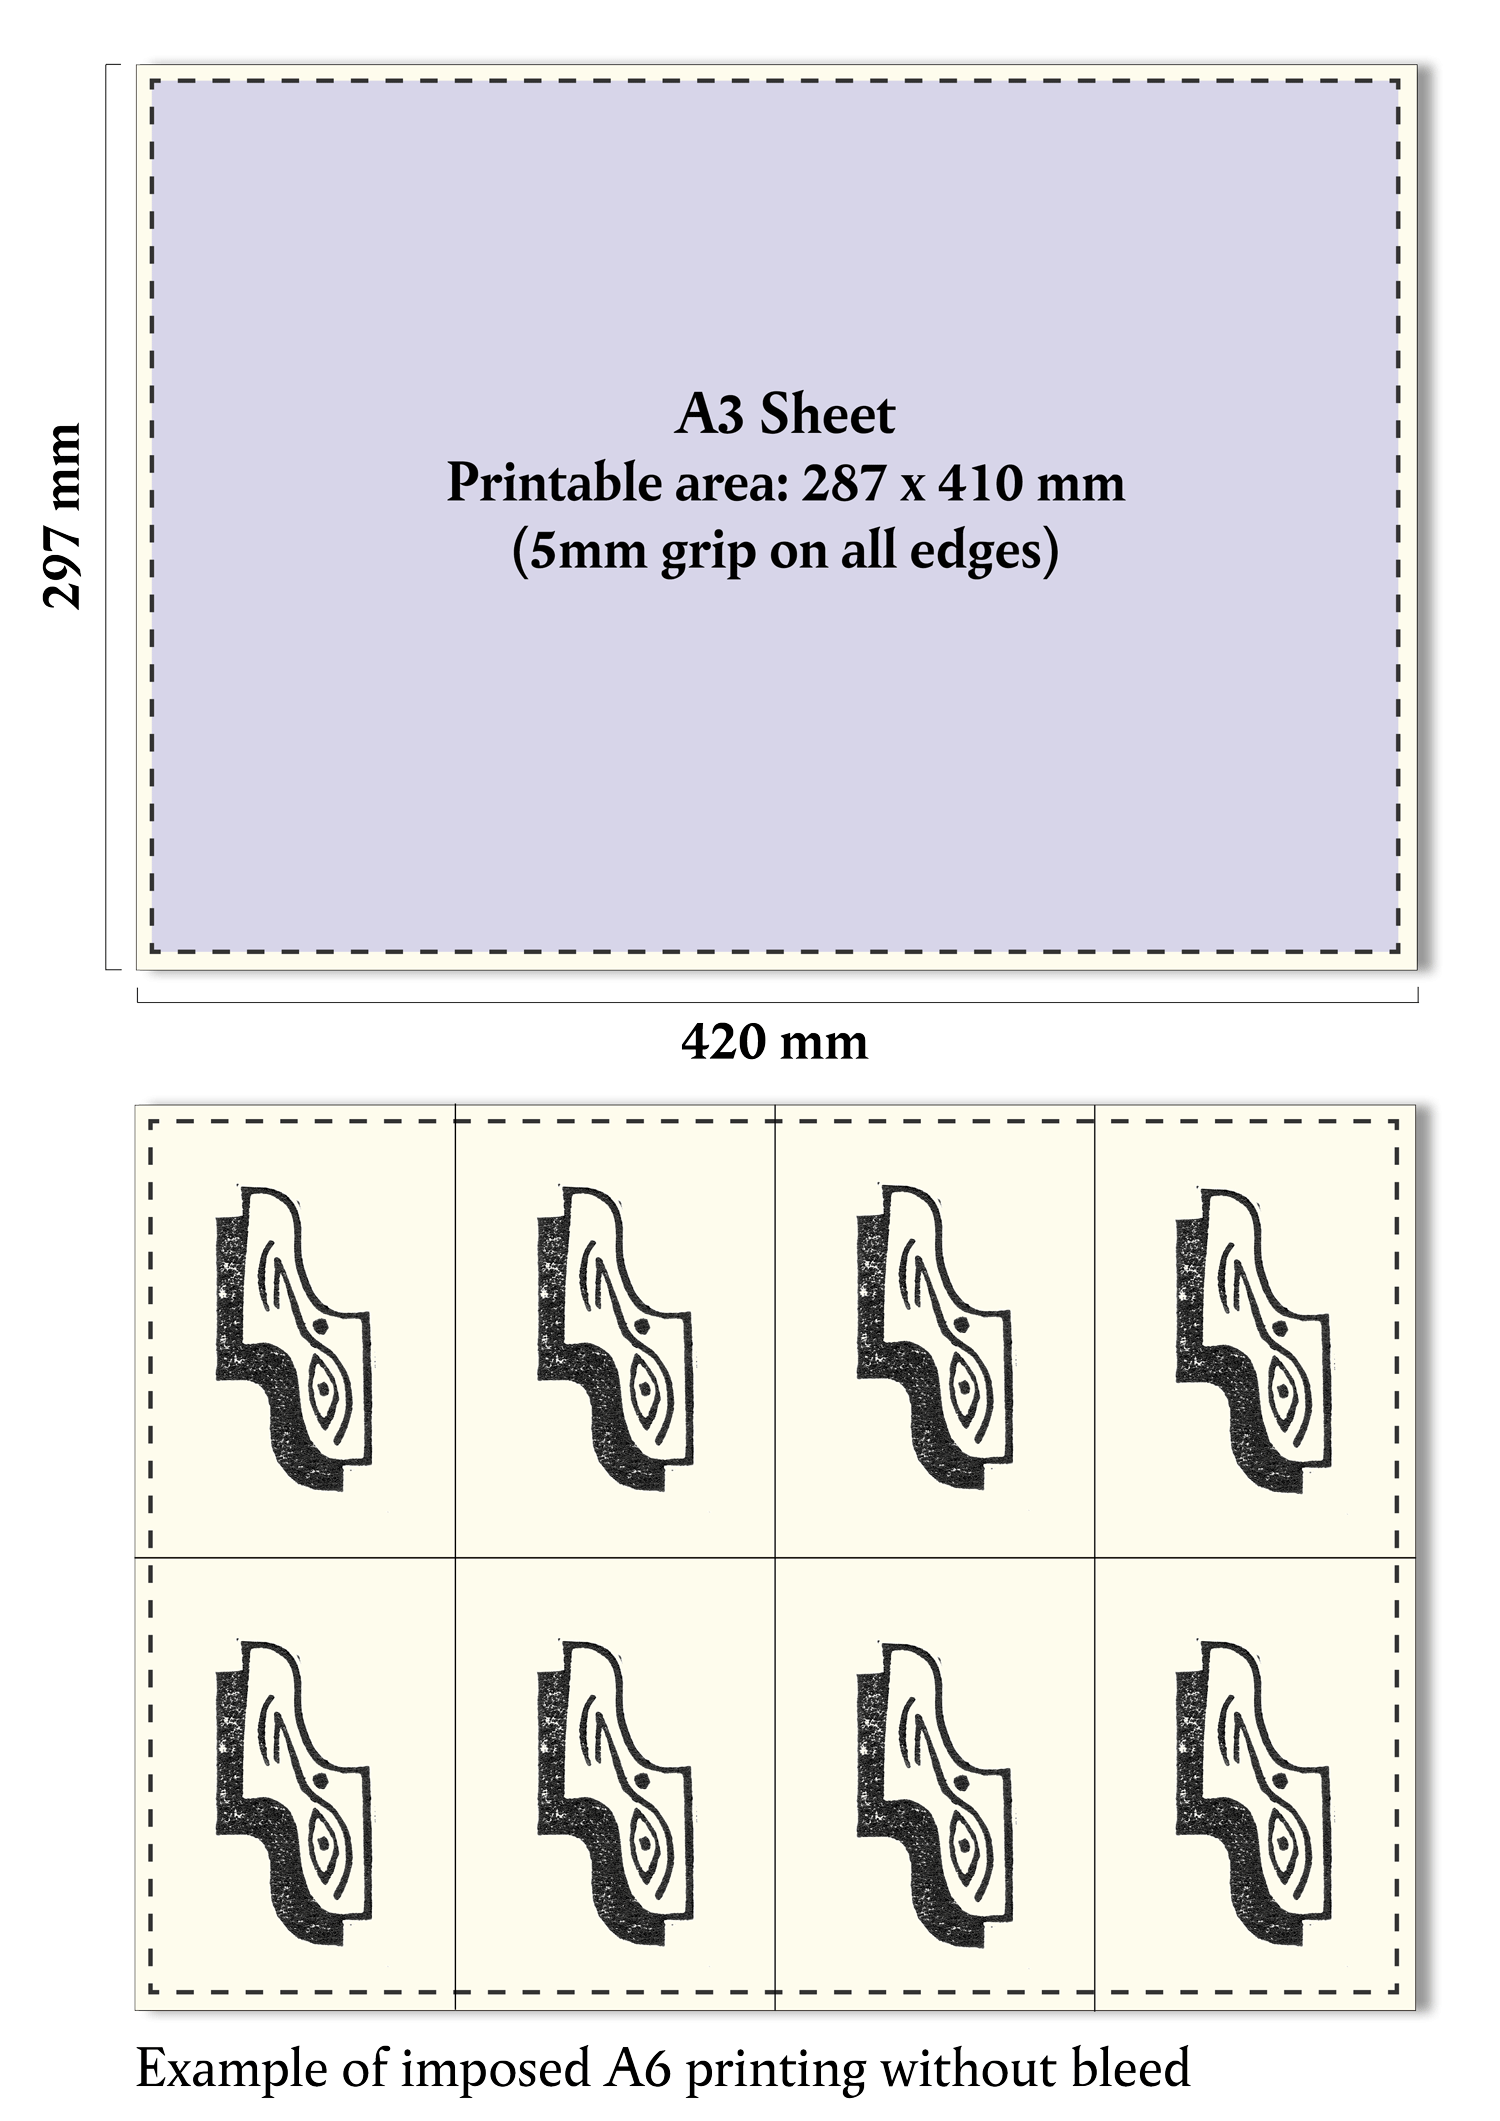
Although A2 Riso printers now exist, our MH 9350E printers can print up to A3 in size. We need 5mm grip round the edge of the A3 sheet where we cannot print, so the maximum printable area is 287 x 410mm.
These margins do mean that in order to maximise this printable area and print in the most economical way, books will end up being slightly smaller than 'standard' sizing.
Here are some maximum finished sizes for books both with and without bleed:
"A4"
With bleed - 202 x 281 mm
Without bleed - 207 x 291 mm
"A5"
With bleed - 140.5 x 199 mm
Without bleed - 145 x 204 mm
"A6"
With bleed - 99.5 x 137.5 mm
Without bleed - 102 x 142.5 mm
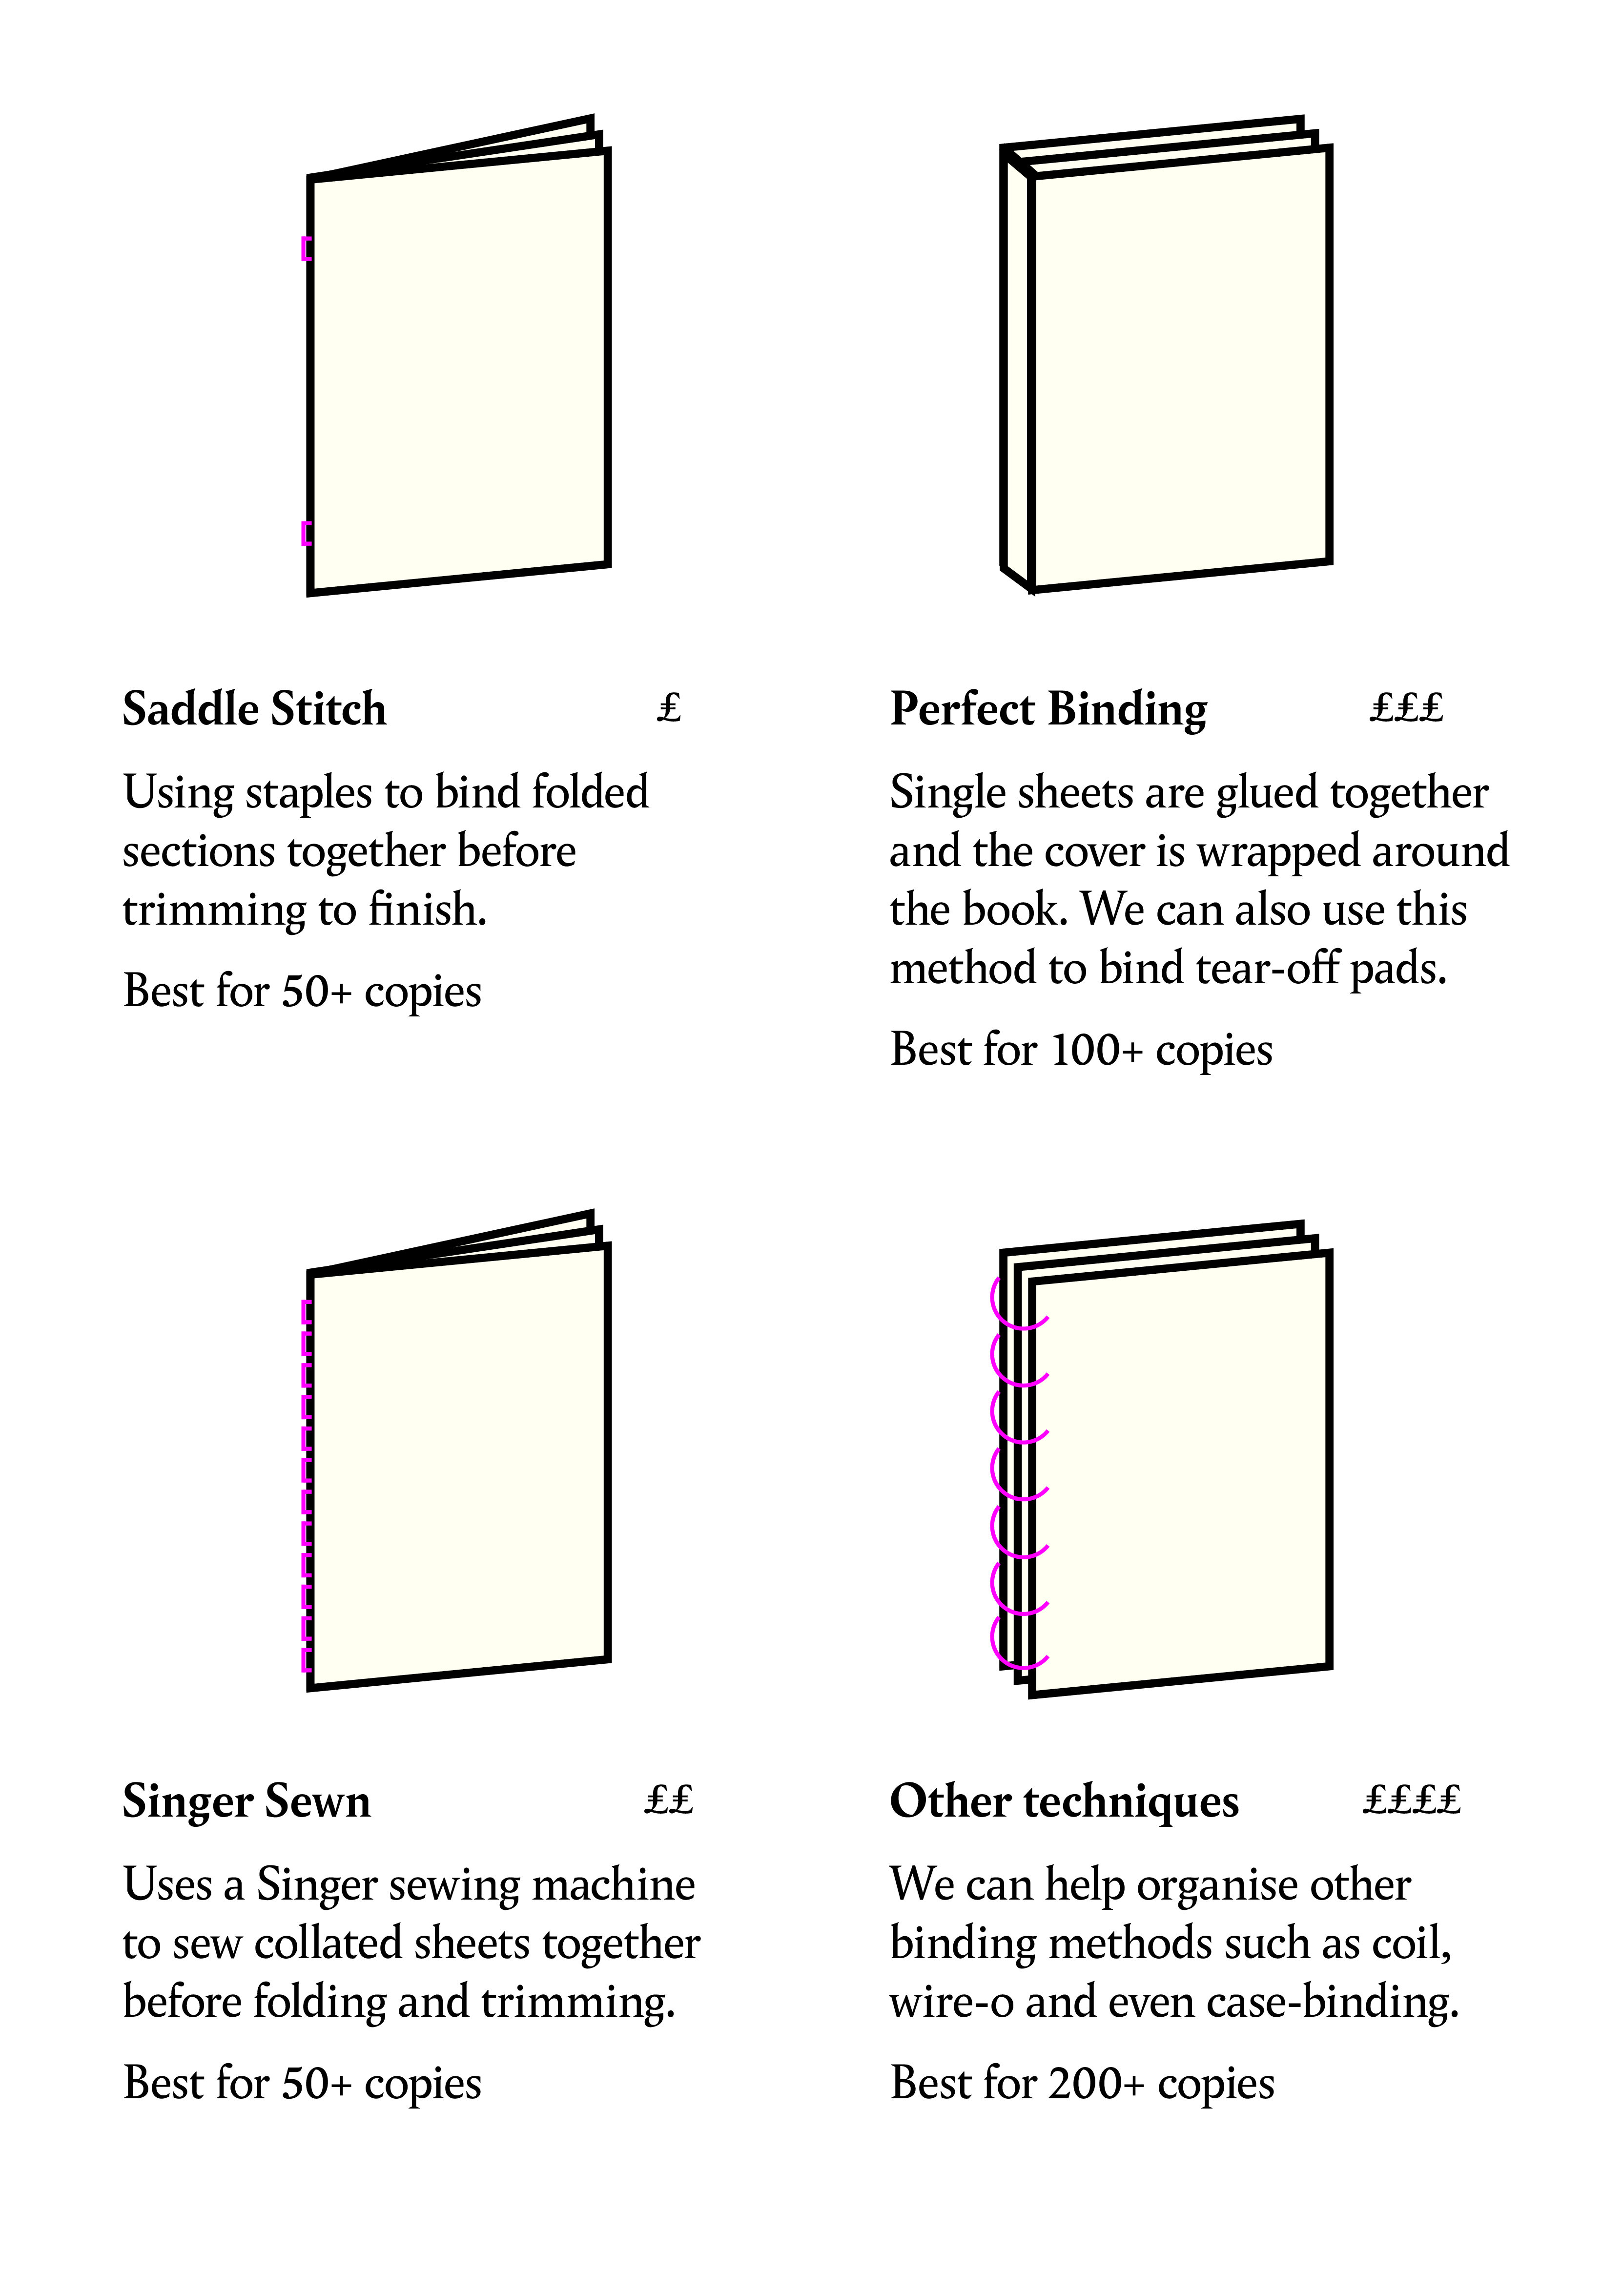
Books
We offer several different binding options; either bound in-house or outsourced to trusted specialists.
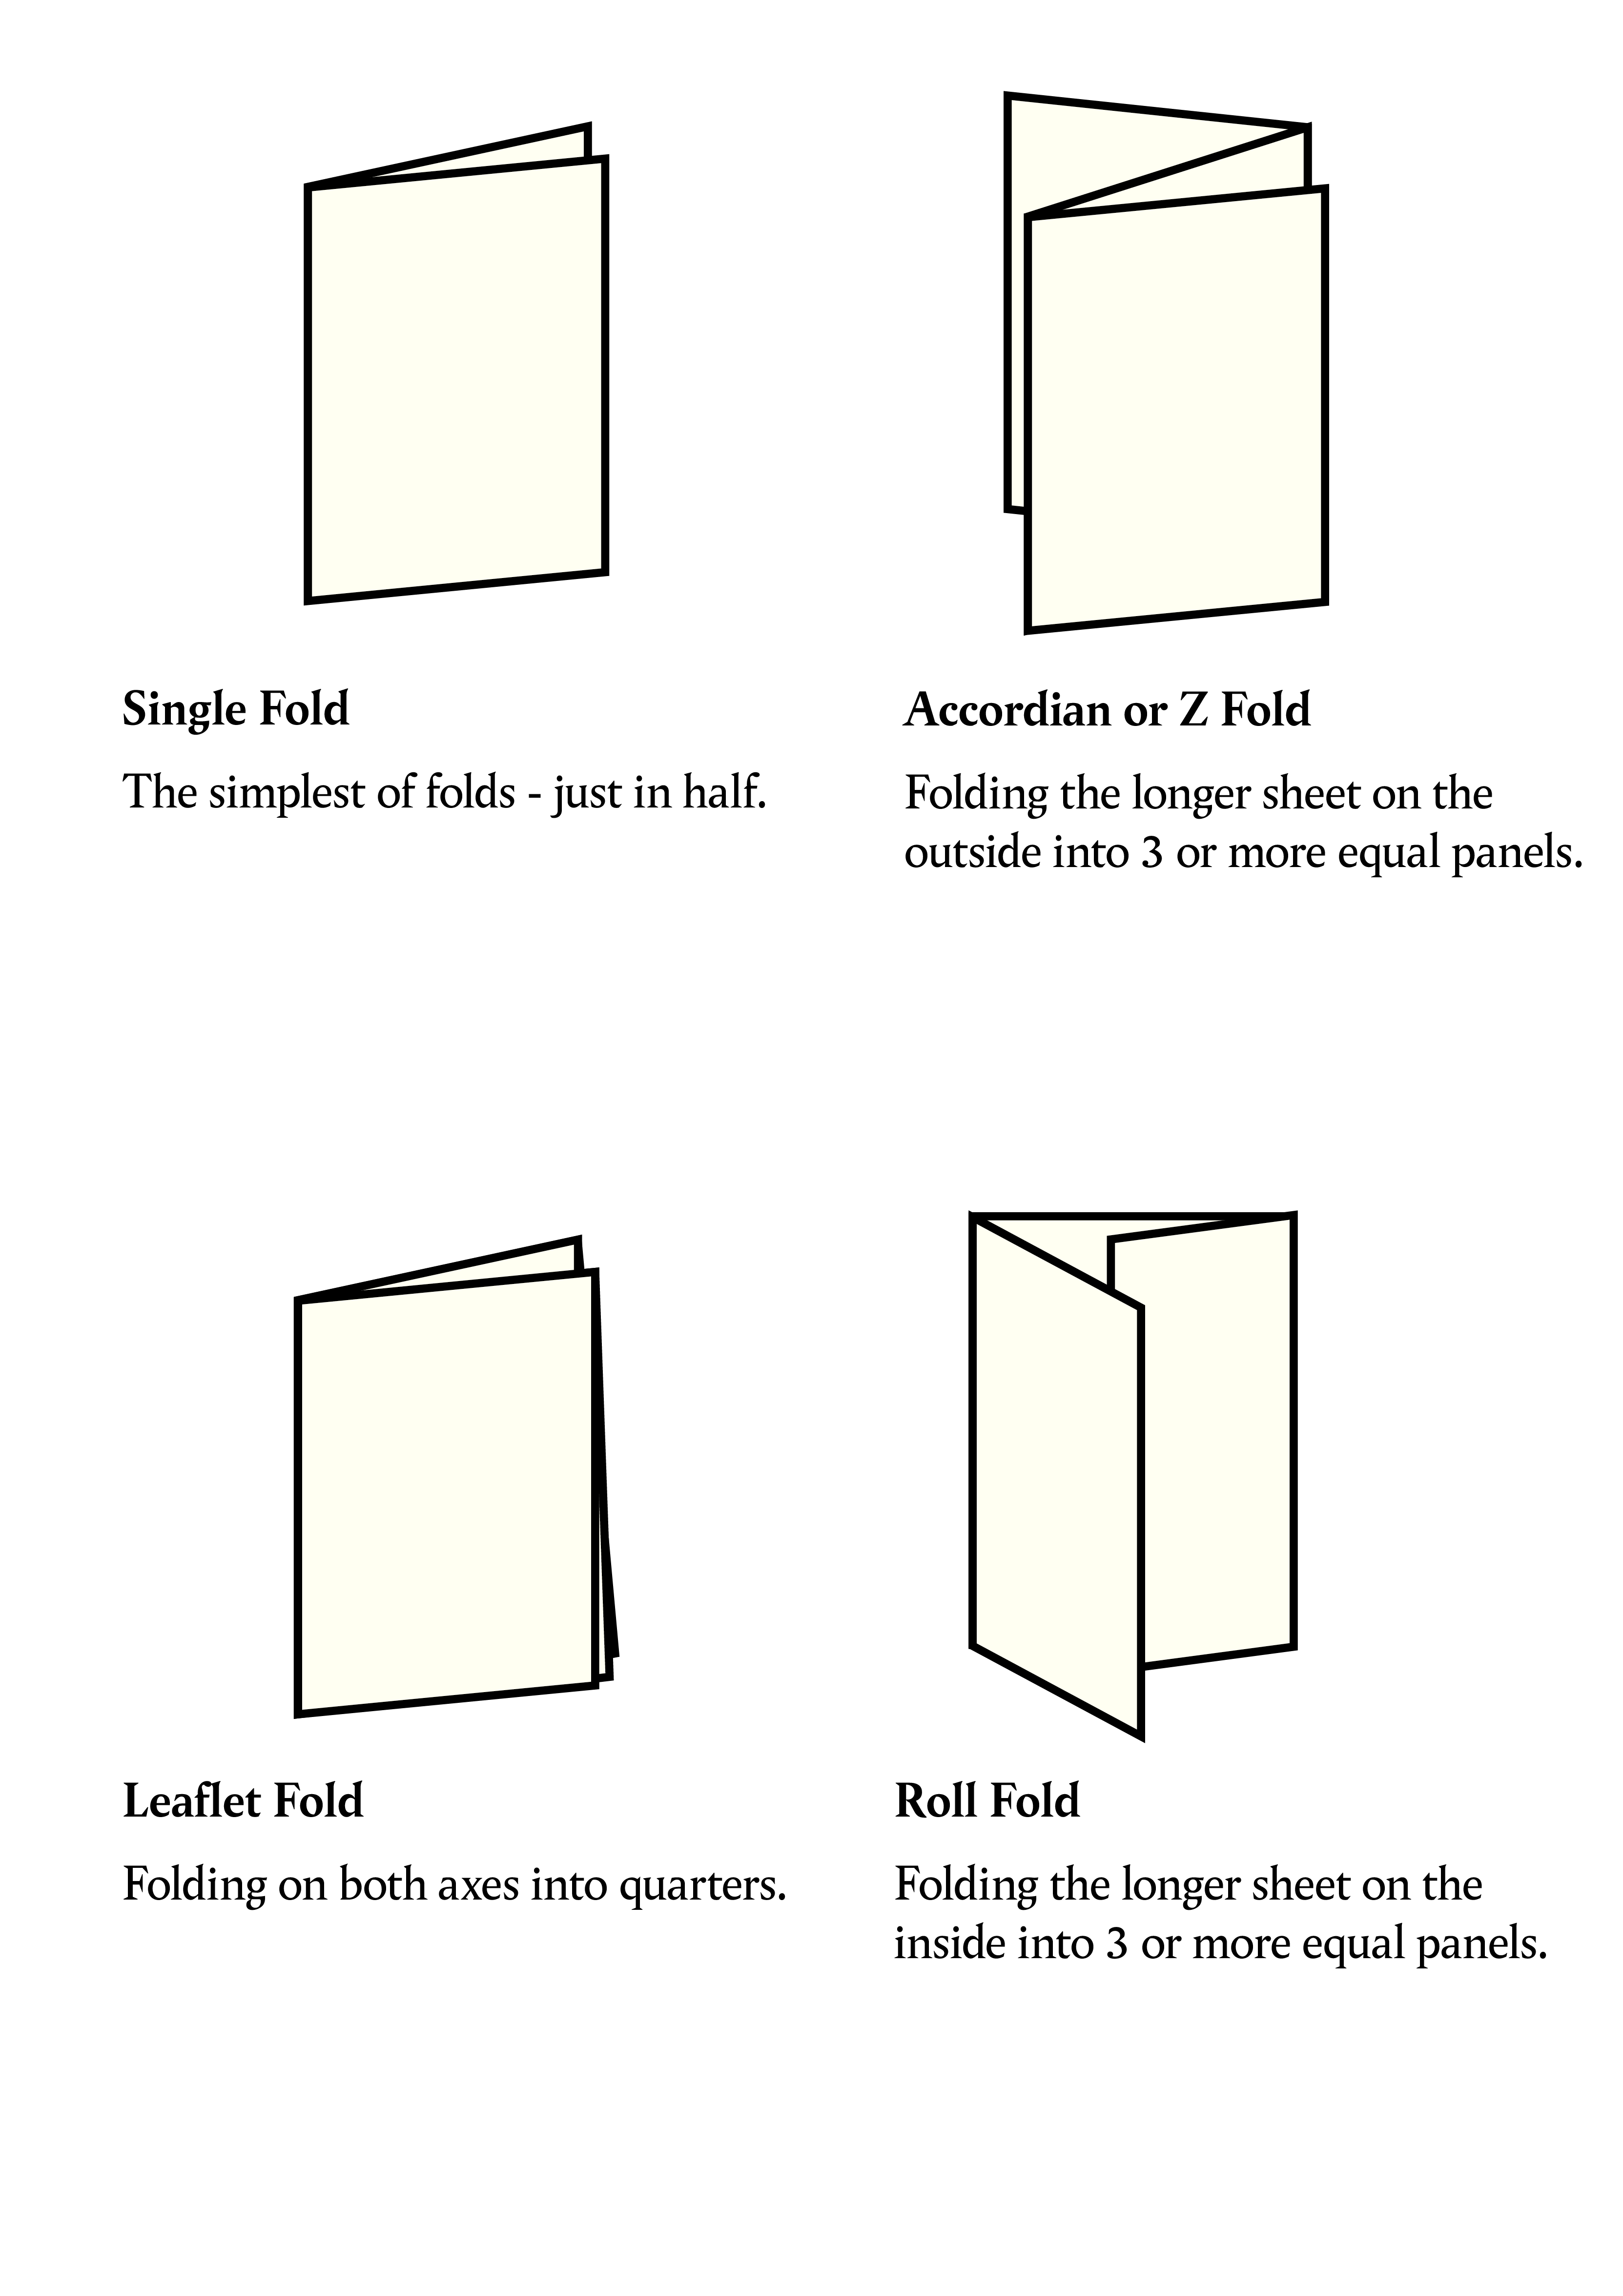
Folding & Creasing
We can fold anything under 120gsm (such as leaflets, pamphlets and newsletters) whereas any thicker stocks require creasing before they can be folded (such as book covers, greetings cards and wedding invites).